
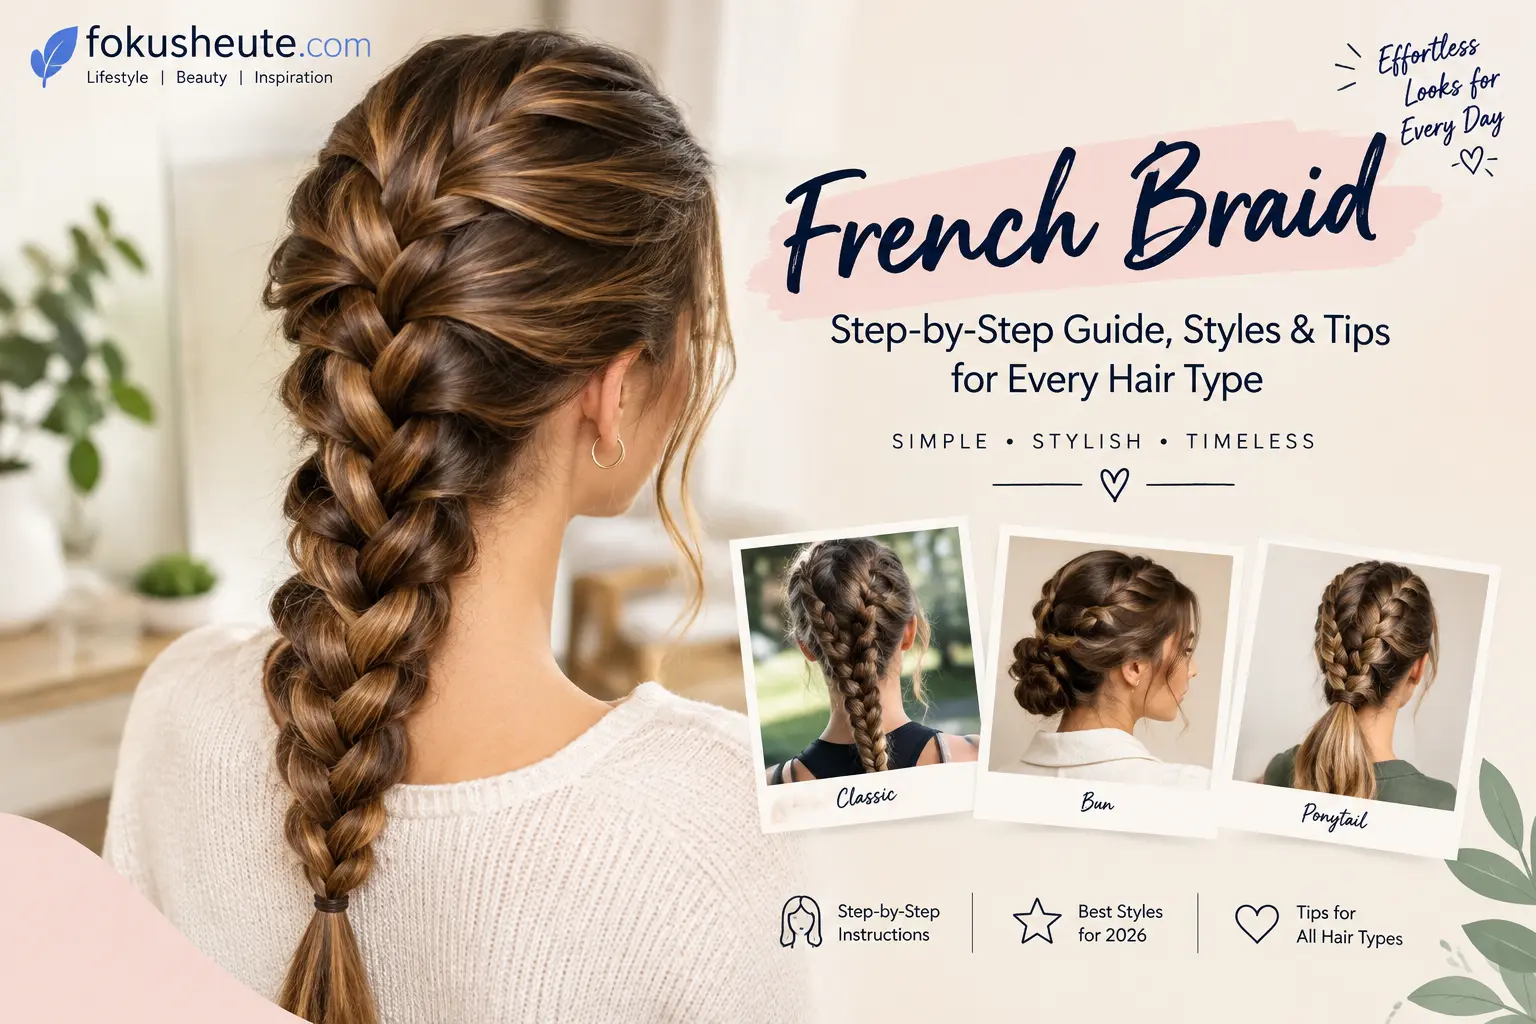
French braid is one of the most recognizable and versatile ways to style hair. It combines the basic three-strand braiding technique with gradually added sections of hair, creating a neat braid that follows the shape of the head. A French braid can look polished and sleek, relaxed and textured, sporty, romantic, or completely casual depending on how you section and hold the hair.
Learning a French braid is also useful because the technique teaches several fundamental braiding skills at once: sectioning, hand positioning, controlled tension, adding hair evenly, and maintaining a consistent pattern. Once those skills become familiar, many other braided hairstyles become easier to understand.
The good news is that you do not need professional hairstyling experience to learn this technique. The hardest part for most beginners is coordinating the three strands while picking up additional hair. With a little practice and the right method, you can learn to create the style on yourself or someone else.
This guide explains everything from the basic technique and hair preparation to different hair lengths, textures, occasions, modern 2026 styling ideas, common mistakes, maintenance, and beginner troubleshooting. The goal is to give you enough practical information to understand not only how to create the style, but also why each step matters.
What Is a French Braid?
A French braid is a three-strand hairstyle in which additional sections of hair are gradually incorporated into the outer strands as the braid moves from the crown toward the nape.
Unlike a basic three-strand braid, where you begin with three sections and continue crossing the same strands until the ends, this technique continually gathers new hair. The result is a braid that stays close to the scalp instead of hanging freely from the starting point.
The basic movement is simple:
- Divide the starting hair into three sections.
- Cross one outer section over the middle.
- Add a small amount of loose hair to that outer section.
- Cross it over the middle again.
- Repeat on the opposite side.
- Continue until all available hair has been incorporated.
- Finish the remaining length as a normal three-strand plait.
The braid generally lies relatively flat against the head because the added hair is incorporated as you move downward.
The name can be misleading because the technique is not simply about French culture or a particular hair type. Variations of scalp braiding have appeared across different cultures and historical periods, and the exact origins of the modern name are disputed.
How Does a French Braid Work?
The technique works by repeatedly combining new hair with one of the three working strands before that strand crosses the center.
Imagine your three strands as:
Left — Middle — Right
You perform a repeating pattern:
Left over Middle → add hair to Left → Right over Middle → add hair to Right
Then repeat.
The important detail is that you are not creating a completely new braid every time you add hair. You are adding loose hair to the existing outer strand and then crossing that combined section over the center.
Why does the braid stay close to the head?
Because each new section is collected from the hair surrounding the braid and immediately incorporated into the structure. This allows the braid to gradually follow the curve of the scalp.
Why does a braid sometimes become loose?
Usually, one of three things happens:
- The sections are too large or inconsistent.
- The strands are being held too far away from the scalp.
- Tension is being released while new hair is being collected.
Controlled tension is important, but comfortable tension is better than pulling as tightly as possible. Excessive pulling can make the style uncomfortable and may place unnecessary stress on the hairline.
How to French Braid Hair Step by Step
If you are completely new to braiding, concentrate on one movement at a time rather than trying to memorize the entire process.
What you need
You can create the style with very few tools:
- A detangling brush or wide-tooth comb
- A tail comb for precise sectioning
- A small hair elastic
- Sectioning clips if your hair is thick
- A light styling cream or mousse if extra grip is needed
- A small amount of hairspray or edge product for flyaways
You do not need expensive equipment.
Step 1: Detangle the hair
Start with smooth, manageable hair. Work through tangles from the ends upward rather than aggressively pulling through knots from the roots.
Step 2: Choose your starting point
For a classic style, begin around the crown or upper back of the head.
Take a central section of hair and separate it into three approximately equal strands.
Step 3: Start like a regular braid
Make one or two normal crossings first.
Cross the left section over the middle.
Then cross the right section over the new middle.
This establishes the braid pattern before you start adding loose hair.
Step 4: Add hair to the left section
Pick up a small section of loose hair from the left side.
Combine it with the left working strand.
Then cross that enlarged section over the middle.
Step 5: Add hair to the right section
Take a similar amount of loose hair from the right side.
Add it to the right working strand.
Cross the combined section over the middle.
Step 6: Repeat the pattern
Continue alternating sides:
Add hair → cross over the middle → add hair → cross over the middle.
Try to keep the added sections reasonably similar in size.
Step 7: Continue toward the nape
As you move down the head, gradually incorporate all the remaining loose hair.
Keep your hands relatively close to the head. This helps the braid follow the scalp and reduces unwanted looseness.
Step 8: Finish the remaining length
Once there is no more loose hair to collect, stop adding sections.
Continue with a normal three-strand braid until you reach the desired length.
Step 9: Secure the end
Use a small elastic that holds the braid without requiring excessive tension.
Step 10: Refine the finish
Check the braid from different angles.
You can gently pull at the outer edges to create a softer, fuller appearance, or leave the structure tight for a clean and polished finish.
How to French Braid Your Own Hair
Braiding your own hair is more difficult than braiding someone else’s because you cannot easily see the back of your head.
The technique itself does not change. What changes is how you control your hands and identify sections by touch.
Start with easy conditions
Practice when you are not rushing. Hair that has some natural grip can also be easier to control than extremely slippery freshly washed hair.
Some professional tutorials recommend slightly less freshly washed hair because very clean, silky strands can slip during styling.
Use your fingers as guides
Instead of constantly trying to look behind you, learn to recognize the three working strands by touch.
Keep one strand between specific fingers and use the remaining fingers to collect new hair.
At first, this will feel awkward. That is normal.
Practice with a mirror
A second mirror can help you see the back of your head, but do not depend on sight forever. Learning the movement by touch makes self-braiding much easier.
Start lower if necessary
If starting at the crown feels impossible, practice a smaller side section first.
Once your hands understand the movement, move toward a full-head style.
Keep the added sections small
Large pickups make it difficult to maintain a consistent pattern.
Smaller, controlled additions usually give beginners more time to maintain their grip.
What is the hardest part of braiding your own hair?
For most beginners, the hardest part is maintaining tension while simultaneously collecting new sections. The solution is not to pull harder. Instead, keep the existing strands controlled before reaching for the next section.
How to French Braid Someone Else’s Hair
Braiding another person’s hair is usually easier because you can see the sections and work from a stable position.
Step 1: Detangle
Remove knots before starting.
Step 2: Position the person comfortably
Have the person sit upright with their head in a natural position.
Avoid asking them to constantly tilt their head because this can change your working angle.
Step 3: Create three starting sections
Take a section near the crown and divide it into three balanced pieces.
Step 4: Establish the pattern
Make the first one or two regular crossings.
Step 5: Begin adding hair
Collect a small section from one side, combine it with the corresponding outer strand, and cross it over the center.
Repeat on the other side.
Step 6: Maintain consistent tension
Your hands should remain relatively close to the head.
If you pull the braid away from the scalp, the structure can become loose.
Step 7: Finish normally
Once all the hair is incorporated, continue with a regular plait and secure it.
This method is particularly useful when creating hairstyles for children, clients, friends, family members, or formal occasions.
How to Prepare Your Hair for a French Braid
Hair preparation can make the actual braiding process much easier.
Detangle first
Knots can cause individual strands to catch on one another, making clean sectioning difficult.
Avoid excessive product
Too much oil or heavy conditioner can make the hair slippery.
On the other hand, extremely dry or frizzy hair may benefit from a small amount of lightweight styling cream.
Add grip when necessary
Fine or silky hair can sometimes benefit from a small amount of texture spray, mousse, or dry shampoo.
Use only enough to improve control.
Consider your hair’s condition
Damaged or fragile hair should be handled gently. Avoid repeatedly tightening the same sections.
Should you braid freshly washed hair?
You can, but very clean hair may be more slippery. Slightly textured hair can sometimes provide better grip, which is why some professional tutorials recommend second-day hair for easier styling.
Common French Braid Mistakes and How to Fix Them
Even experienced braiders can produce an uneven result when section sizes or tension change.
Mistake 1: Unequal sections
If one side receives significantly more hair than the other, the braid can look unbalanced.
Fix: Keep your added sections similar in size whenever possible.
Mistake 2: Pulling too tightly
A very tight braid may look neat but can become uncomfortable.
Fix: Use controlled, moderate tension.
Mistake 3: Letting the strands merge
If the three working sections become difficult to distinguish, stop and separate them before continuing.
Mistake 4: Adding hair too randomly
Large, irregular pickups create a lumpy appearance.
Fix: Take deliberate sections before every crossover.
Mistake 5: Moving your hands too far away
This can cause the braid to loosen away from the scalp.
Fix: Keep your hands close to the head.
Mistake 6: Starting with tangled hair
Tangles make every subsequent step harder.
Fix: Detangle completely before sectioning.
Mistake 7: Losing tension while picking up hair
This is one of the most common beginner problems.
Fix: Secure the existing strands with your fingers before reaching for the next section.
Mistake 8: Making the braid too perfect
A slightly relaxed finish can actually look more modern and natural.
For a soft 2026-inspired appearance, you can keep the structure controlled while gently loosening selected outer sections after securing the braid.
French Braid vs Dutch Braid
The main difference is the direction in which the outer sections cross the middle.
In a French-style technique, the outer strand crosses over the middle.
In a Dutch-style technique, the outer strand crosses under the middle.
That small movement produces a noticeably different appearance.
A Dutch braid tends to look raised and more three-dimensional, while a French braid generally sits flatter against the head.
| Feature | French Braid | Dutch Braid |
|---|---|---|
| Main crossing | Over the middle | Under the middle |
| Appearance | Flatter | Raised |
| Visual effect | Blended into the hair | More prominent |
| Beginner learning | Requires controlled sectioning | Similar sectioning with opposite crossing |
| Styling options | Casual, formal, sleek, soft | Sporty, bold, dramatic |
Neither technique is universally better. The right choice depends on the appearance and hold you want.
French Braid vs Regular Braid
A regular three-strand braid uses three sections without continuously adding loose hair.
A French-style braid starts with three sections but gradually incorporates additional hair as it travels down the head.
The easiest way to remember the difference is:
Regular braid: three sections stay separate from the surrounding hair.
French braid: new hair is continuously added to the three working sections.
Once all loose hair has been incorporated, the remaining length becomes a regular three-strand braid.
Best French Braid Hairstyles for 2026
Modern styling in 2026 is not limited to one perfectly polished appearance.
Current tutorial trends show a mixture of structured sections, soft texture, controlled looseness, sporty practicality, and occasion-based styling.
Popular directions include:
- Clean and sleek braids
- Soft, slightly loosened braids
- Double braids
- Side placements
- Braided ponytails
- Braided buns
- Half-up variations
- Romantic event styles
- Sport-friendly looks
- Textured braids for natural movement
The best version depends on your hair length, texture, outfit, and the amount of time you want the hairstyle to remain secure.
Two French Braids
Two French braids are created by dividing the hair into two sides and braiding each side separately.
This style is practical because it distributes the hair more evenly across the head.
How to create two braids
- Create a clean center part.
- Secure one side temporarily.
- Divide the other side into three starting sections.
- Follow the normal adding-and-crossing technique.
- Finish and secure the first side.
- Repeat on the opposite side.
- Compare both braids and gently adjust them if needed.
A precise center part creates a symmetrical result, while a slightly imperfect part can give the hairstyle a more relaxed appearance.
Side French Braid
A side placement changes the visual balance of the hairstyle.
Instead of directing the braid straight down the center, guide it toward one side of the head.
A side braid can work particularly well with:
- Loose waves
- Low ponytails
- Half-up hairstyles
- Romantic outfits
- Casual everyday looks
The key is to decide the direction before you begin. Constantly changing the direction halfway through can make the structure uneven.
French Braid Ponytail
A braided ponytail combines a scalp braid with the simplicity of a ponytail.
You can braid from the crown down toward the back and then gather the remaining hair into a ponytail.
Another option is to create a smaller braid along one side and merge it into a low or high ponytail.
This works well when you want hair controlled around the face without completely braiding the entire head.
French Braid Updo
A braided updo can turn a simple scalp braid into a more formal hairstyle.
One approach is to braid the hair toward the nape, then twist or coil the remaining length into an updo.
Secure the shape with pins and check the hairstyle from the front, sides, and back.
For formal events, small imperfections can be softened with loose face-framing pieces.
French Braid Bun
A braided bun combines the structure of a scalp braid with the compact finish of a bun.
You can:
- Create one central braid and turn the remaining length into a bun.
- Create two side braids and merge them into a low bun.
- Use a braid around the bun as a decorative element.
A small amount of texture can help the bun stay visually fuller.
French Braid for Short Hair
Short hair can absolutely be braided, but the technique requires more precision because there is less length available for securing the structure.
Short layers may also escape from the braid.
Helpful tips
- Work with smaller sections.
- Keep the braid close to the head.
- Use a small amount of styling cream for grip.
- Secure the end before it becomes too short.
- Consider a side braid or half-up variation if a full-head braid is difficult.
For very short hair, a partial braid may be more practical than trying to incorporate every strand.
For the latest, updated, and unique information, visit explore learning.
French Braid for Medium-Length Hair
Medium-length hair is often flexible enough for many variations.
You can create:
- A classic back braid
- Two braids
- Side braids
- Half-up styles
- Braided ponytails
- Braided buns
Layered medium hair may require extra attention because shorter pieces can escape as the braid moves downward.
French Braid for Long Hair
Long hair gives you plenty of length for creative styling.
However, longer hair also creates more weight and can make the braid difficult to control.
Keep the added sections consistent and avoid making the starting sections excessively large.
Long hair can be finished as:
- A standard braid
- Ponytail
- Bun
- Low updo
- Side braid
- Loose textured braid
French Braid for Straight Hair
Straight hair can produce a very clean and defined braid, but extremely smooth hair may slip.
If your strands do not hold well, use a small amount of lightweight texture product.
Avoid applying heavy oils immediately before braiding because they may reduce grip.
For a sleek finish, smooth the surface as you work.
For a softer appearance, gently loosen the finished braid after securing it.
French Braid for Wavy Hair
Wavy hair naturally adds texture and dimension to a braid.
Before starting, decide whether you want to preserve your natural wave pattern or create a smoother result.
For a relaxed hairstyle, avoid aggressively brushing out all the texture.
For a cleaner braid, gently detangle and smooth each section before incorporating it.
French Braid for Curly Hair
Curly hair can create a beautiful textured result, but preparation is important.
Work with the natural curl pattern instead of repeatedly pulling the hair straight.
Helpful practices
- Detangle carefully.
- Use adequate moisture.
- Work in manageable sections.
- Avoid excessive tension.
- Use a suitable styling cream or gel when needed.
- Expect some texture and curl variation along the braid.
The goal is not necessarily to eliminate every curl. A controlled textured finish can be part of the hairstyle’s appeal.
French Braid for Thick Hair
Thick hair may require more section control.
If you take very large additions, your hands can become overloaded and the braid may become difficult to manage.
Use manageable sections and consider sectioning clips to keep unused hair organized.
For especially dense hair, take slightly smaller additions and allow yourself more time.
French Braid for Fine or Thin Hair
Fine hair can sometimes slip out of the braid more easily.
A lightweight texturizing product can add grip without making the hair heavy.
For additional visual volume:
- Keep the braid secure.
- Gently loosen the outer edges.
- Avoid pulling out too much hair.
- Use smaller, consistent sections.
- Consider a slightly relaxed finish.
Do not tighten excessively just to make the braid appear fuller.
French Braid for Layered Hair
Layers can make braiding more challenging because shorter pieces may not reach the end of the structure.
The solution is not necessarily to force every strand into one perfect line.
Instead:
- Smooth shorter layers into each section.
- Use lightweight styling product where necessary.
- Keep your section size consistent.
- Allow small pieces to remain loose if they naturally fall out.
- Secure the finished style with pins when necessary.
A few face-framing pieces can also turn an unavoidable layer into part of the hairstyle.
French Braid for School
For school, practicality usually matters more than elaborate styling.
Two symmetrical braids can keep hair away from the face and remain comfortable during a busy day.
A single braid also works well when you want a simple, tidy hairstyle.
Use soft hair ties and avoid excessive scalp tension, especially when the style will be worn for many hours.
French Braid for Work
A clean, controlled braid can be appropriate for professional environments without looking overly formal.
A sleek center braid, low braid, or braided ponytail can keep hair organized while maintaining a polished appearance.
For a professional finish:
- Keep sections relatively smooth.
- Control flyaways.
- Avoid excessive looseness.
- Choose simple accessories.
- Make sure the hairstyle feels comfortable throughout the day.
French Braid for Sports and Workouts
A secure braid can help keep hair controlled during physical activity.
For workouts, prioritize comfort and stability over extreme tightness.
Two braids can distribute the hair more evenly, while a single braid may work well for longer hair.
Sweat, movement, and friction can affect the style, so use a secure but gentle elastic.
If the scalp feels painful or the hair is pulling, loosen the hairstyle.
French Braid for Weddings and Formal Events
Formal styling gives you more opportunities to combine braiding with other techniques.
A braid can become part of:
- A low bun
- Romantic updo
- Half-up hairstyle
- Side-swept style
- Braided crown
- Textured bridal hairstyle
For formal events, practice the complete hairstyle before the event.
This helps you determine how much volume, texture, product, and pinning you actually need.
French Braid for Everyday Wear
For everyday styling, simplicity usually wins.
A classic single braid can be completed quickly once the technique becomes familiar.
You can also create a relaxed version by gently loosening the outer sections after securing it.
Everyday options include:
- One back braid
- Two braids
- Side braid
- Half-up braid
- Braided ponytail
The style does not need to be perfectly symmetrical to look attractive.
How to Make a French Braid Last Longer
How long the hairstyle lasts depends on hair texture, preparation, activity, humidity, friction, and how securely it is finished.
Start with manageable hair
Excessively slippery hair may not hold as well.
Use suitable grip
A lightweight styling product can help fine or smooth hair.
Keep the structure consistent
Uneven sections can create weak areas.
Secure the end properly
Use an elastic that holds without damaging or excessively compressing the hair.
Reduce unnecessary friction
Repeatedly touching, pulling, or sleeping directly on the braid can disturb its structure.
Protect it while sleeping
If you want to preserve the hairstyle overnight, minimize friction and avoid tying it so tightly that it becomes uncomfortable.
How to Make a French Braid Look Fuller
A fuller appearance can be created without rebuilding the entire hairstyle.
After securing the braid, gently pull outward on small sections along the edges.
This technique is often called pancaking because it spreads the braid slightly and makes it appear wider.
Do it gradually.
If you pull too aggressively, the braid can lose its structure.
Fine hair can benefit especially from this approach because controlled expansion can create the visual impression of greater volume.
Can a French Braid Create Overnight Waves?
Yes. A braid can create waves when hair dries or remains compressed in the braided shape for several hours.
The final result depends on:
- Hair texture
- Hair length
- Moisture level
- Braid tightness
- How long the braid remains in place
- Whether the hair was damp or dry when braided
A tighter braid generally creates a more defined pattern, while a looser braid can produce softer waves.
For overnight styling, avoid braiding soaking-wet hair tightly. Hair is more vulnerable when wet, and excessive tension can create unnecessary stress.
When you remove the braid, gently separate the waves with your fingers rather than aggressively brushing them.
French Braid Tips for Beginners
If you are learning for the first time, do not judge your progress by whether your first attempt looks perfect.
Focus on mastering the movement.
The easiest practice method
Start with three equal sections.
Practice the over-the-middle movement several times without adding hair.
Once your hands understand the basic crossing pattern, begin adding small sections.
Practice slowly
Speed comes later.
If you rush, your sections become uneven and you are more likely to lose track of the strands.
Keep the sections visible
At first, use your fingers to clearly separate the three working strands.
Use consistent pickups
Try to add approximately the same amount of hair from each side.
Do not pull as hard as possible
Firm control is enough.
The goal is stability, not discomfort.
Learn one side at a time
If both hands feel confused, stop and identify:
Which strand is left?
Which is middle?
Which is right?
Then continue.
Expect the back to feel strange
When braiding your own hair, your hands may feel as though they are working in the wrong direction.
That improves with repetition.
Practice on someone else first
If possible, learning the movement on another person’s hair can make the technique easier to understand because you can see what your hands are doing.
Give yourself several attempts
Braiding is a coordination skill. Repetition builds muscle memory.
FAQs
Is a French braid difficult for beginners?
It can feel difficult at first because you must control three strands while continuously adding new hair. However, the basic pattern is repetitive. Once you understand the over-the-middle movement and the process of adding hair, the technique becomes much easier.
How long does it take to learn a French braid?
There is no fixed learning time. Some people understand the movement after a few attempts, while others need repeated practice. The biggest improvement usually comes from practicing section control and hand positioning rather than trying to braid quickly.
Can I do a French braid on short hair?
Yes. Short hair can be braided, although very short layers may escape. Smaller sections, styling cream, and partial or side-braid variations can make the process easier.
Is a French braid better for straight or curly hair?
It can work with both. Straight hair often produces a cleaner outline, while wavy and curly hair can create more texture and volume. The preparation method should be adjusted to the hair’s natural texture.
Why does my braid become loose?
The most common reasons are inconsistent section sizes, insufficient control while adding hair, or holding the strands too far away from the scalp. Slow down and maintain moderate, even tension.
Why does one side look bigger than the other?
Usually, more hair has been added to one side. Try to take similarly sized sections from both sides as you work downward.
Should I braid wet hair?
It is generally better to avoid tightly braiding soaking-wet hair. Damp or slightly textured hair can be easier to manage, but excessive moisture and tension are not ideal for fragile strands.
Can I sleep with a French braid?
Yes, many people use a loose braid as an overnight hairstyle. Use a comfortable elastic, avoid excessive tension, and reduce friction while sleeping.
Can a French braid damage hair?
The technique itself does not automatically damage hair. Problems can arise from excessive tension, repeated pulling, tight elastics, or rough handling. Keep the braid comfortable and handle the hair gently.
How do I make my braid look bigger?
Gently loosen the outer edges after securing the braid. This can make the structure appear wider and fuller without completely undoing it.
Why does my hair keep falling out of the braid?
Short layers, very smooth hair, uneven sectioning, and insufficient grip can all contribute. Try smaller sections and a lightweight styling product, and avoid repeatedly pulling the same strands.
Can I French braid layered hair?
Yes. Layers may create loose pieces, but they can still be incorporated. Styling cream, careful sectioning, and a few discreet pins can help control shorter strands.
What is the difference between a French braid and a Dutch braid?
The primary difference is the crossing direction. The outer strands cross over the middle in a French technique and under the middle in a Dutch technique. This makes the Dutch version appear more raised and three-dimensional.
What is the difference between a French braid and a regular braid?
A regular three-strand braid uses the same three strands throughout. A French technique continuously adds new hair to those strands as the braid moves down the head.
How do I keep a braid neat all day?
Start with manageable hair, use appropriate grip, keep section sizes consistent, maintain moderate tension, and secure the finished braid properly. Avoid repeatedly touching or pulling the braid.
Is a French braid good for workouts?
Yes. A secure braid can keep hair controlled during physical activity. Choose comfortable tension and a reliable elastic, especially if the hairstyle will remain in place for an extended period.
Can I wear a French braid to a wedding?
Yes. A braid can be incorporated into formal hairstyles such as buns, updos, half-up styles, and side-swept looks. Accessories and controlled texture can make the result more formal.
How do I French braid my own hair without seeing the back?
Learn to identify the three strands by touch, keep your hands close to your head, and practice slowly. A second mirror can help during the learning stage, but eventually your fingers can guide the movement without constant visual feedback.
What products help with braiding?
Useful options include lightweight mousse, texture spray, styling cream, dry shampoo for added grip, hairspray for finishing, and a suitable edge product for flyaways. The right product depends on your hair texture and the finish you want.
How long can a French braid stay in?
There is no universal duration. Hair texture, activity, humidity, friction, preparation, and braid tightness all affect longevity. A carefully prepared braid may remain presentable for much of a day, while a loose style may need refreshing sooner.
Is it better to braid clean or second-day hair?
Very clean, silky hair can sometimes be harder to control because it slips between the fingers. Slightly textured second-day hair may provide more grip, although people with different hair types may prefer different preparation methods.
Conclusion
Learning a French braid is mainly about mastering a repeatable movement rather than memorizing a complicated hairstyle. Start with three manageable sections, cross the outer strands over the middle, add a small amount of new hair before each crossing, and continue the pattern toward the nape.
The quality of the finished style depends heavily on sectioning, tension, preparation, and consistency. You do not need to pull tightly or make every strand perfectly smooth. A controlled technique gives you the foundation, while the final texture can be adjusted to suit your personal style.
Once the basic method becomes comfortable, you can adapt it to short, medium, or long hair and work with straight, wavy, curly, thick, fine, or layered textures. You can also turn the basic technique into two braids, side styles, ponytails, buns, updos, workout hairstyles, everyday looks, and formal event designs.
For the latest, updated, and unique information, visit medical assistant.

One thought on “French Braid: Easy Step-by-Step Guide, Styles & Tips for 2026”